Pre-Lesson without Tiffany {teacher}
November 8th 2016
November 8th 2016
- Researching ideas for patterns & sizes of quilts
- Creating a Pinterest board with ideas


I really like the triangle pattern that we see here. I found these pins and fell in love with the triangles but also the colours.

I really like how this quilt has felt or a softer material - I think I want to use a similar material for my baby quilt.

This pattern is super adorable for a little girl. I love the hearts and the simplicity of it. However, I know that it would not actually be as simple as just cutting out squares, and I'm not sure if I am ready for a pattern this complex for my very first quilt.

This pattern looks more complex, but I think it may actually be more simple. There are larger sections of material, rather then lots of small squares, triangles or pieces to make a heart. However, I'm not sure if I am totally sold on the pattern for my first quilt.

I think this pattern is my favourite. It is all squares, which is what Tiffany will be working with me on, and it is classic. Squares on a quilt are timeless and beautiful. This pattern is nice too, because there are a lot more smaller squares, rather then a few larger squares. I love the colours on this one as well, so I will definitely keep this one in mind moving forward.


The above pins that I found are very helpful and interesting. On the left is a size chart for quilts. I didn't realize that there are so many different sizes you can do. Instead of the really tiny 'baby' one that is pictured, I think I like the 'crib' size better. As well the pin on the right is a very, very adorable idea that I might explore with Tiffany as well. The pin that I found links to a website that has all the instructions of how you would create this baby quilt/sleeping bag. I don't know how easy or how hard that would be to make compared to just a simple quilt, but I will talk to Tiffany about the idea.
First Lesson - with Tiffany
November 19th 2016
- How to use a sewing machine
My second lesson, the first one with Tiffany, was scheduled to happen at her house where she typically does other sewing classes. When I arrived she gave me a little tour of her home and brought me to the room where she keeps all her supplies.
Tiffany had shared with me ahead of time that she is a wholesaler for fabric. She said that we could go together to the fabric store to choose fabric when the time came, but I also had the option of choosing fabric from her selection. I was blown away by the number of options that she had available. I struggle with making decisions, so I knew that I would not be going to the store. I was already overwhelmed with the options she had - which she thinks isn't that much(!!).
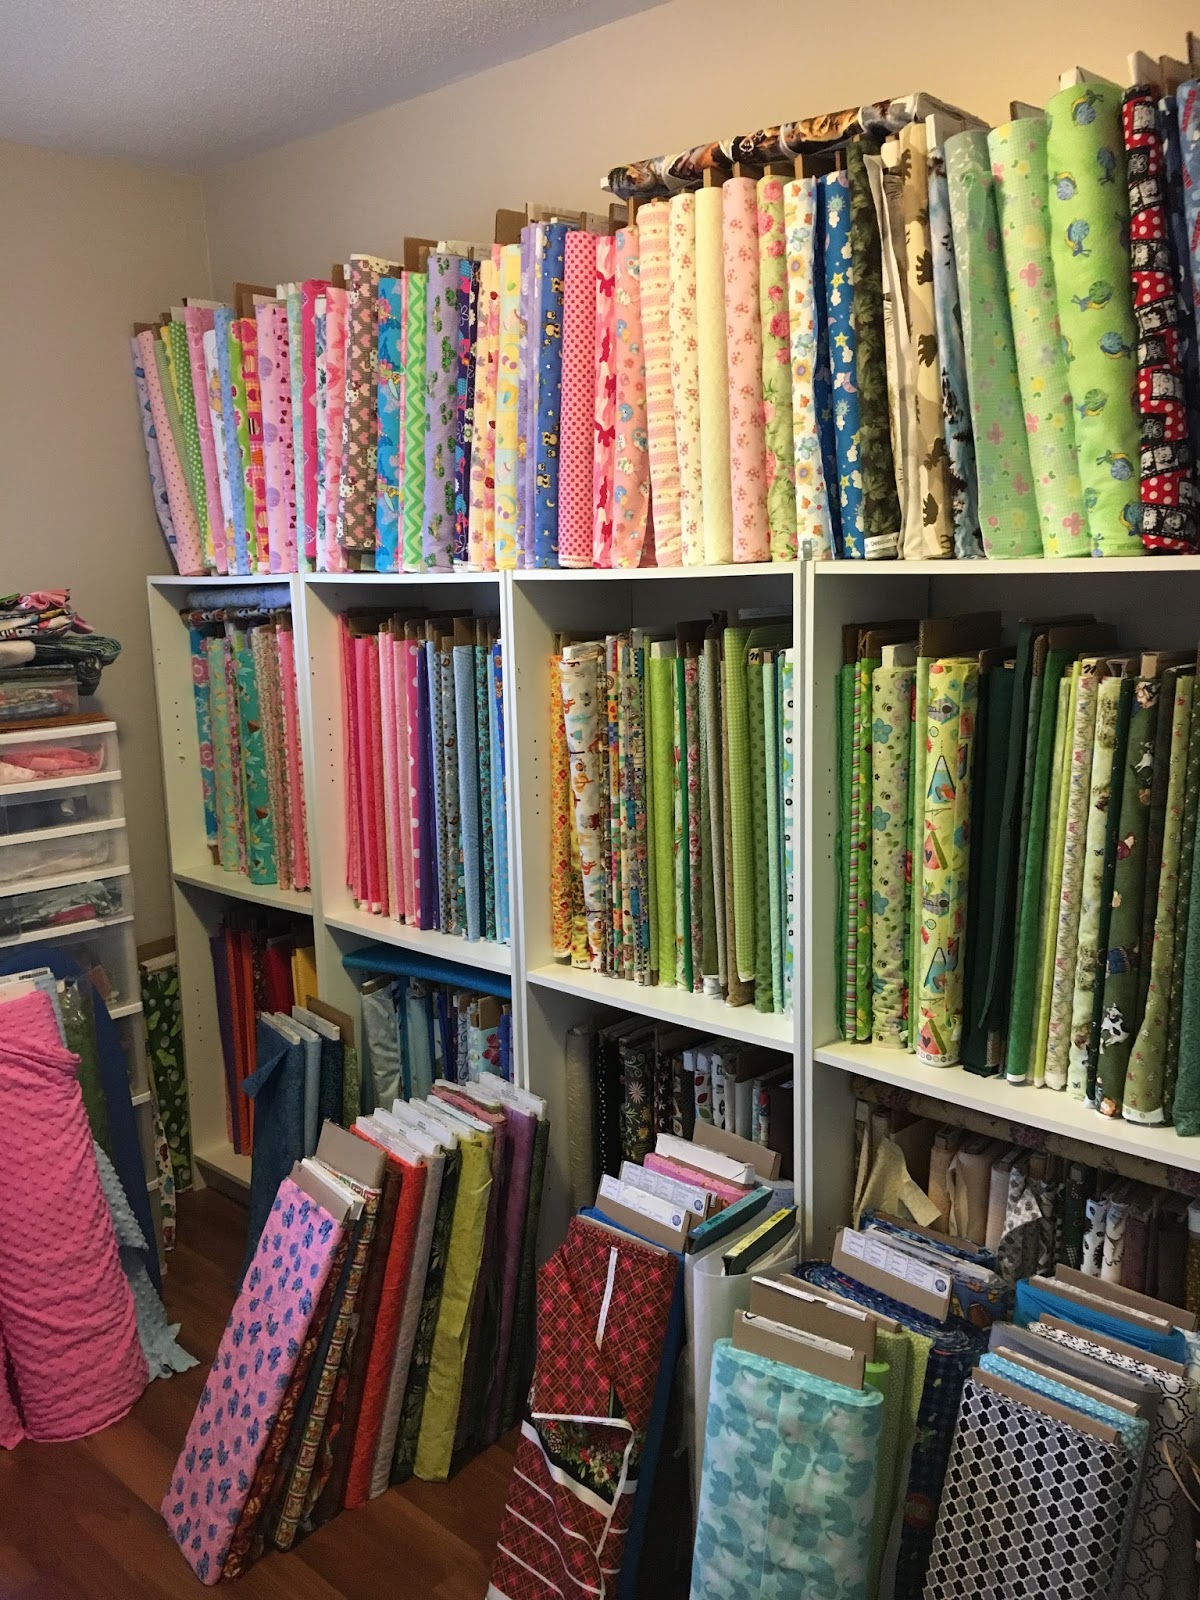
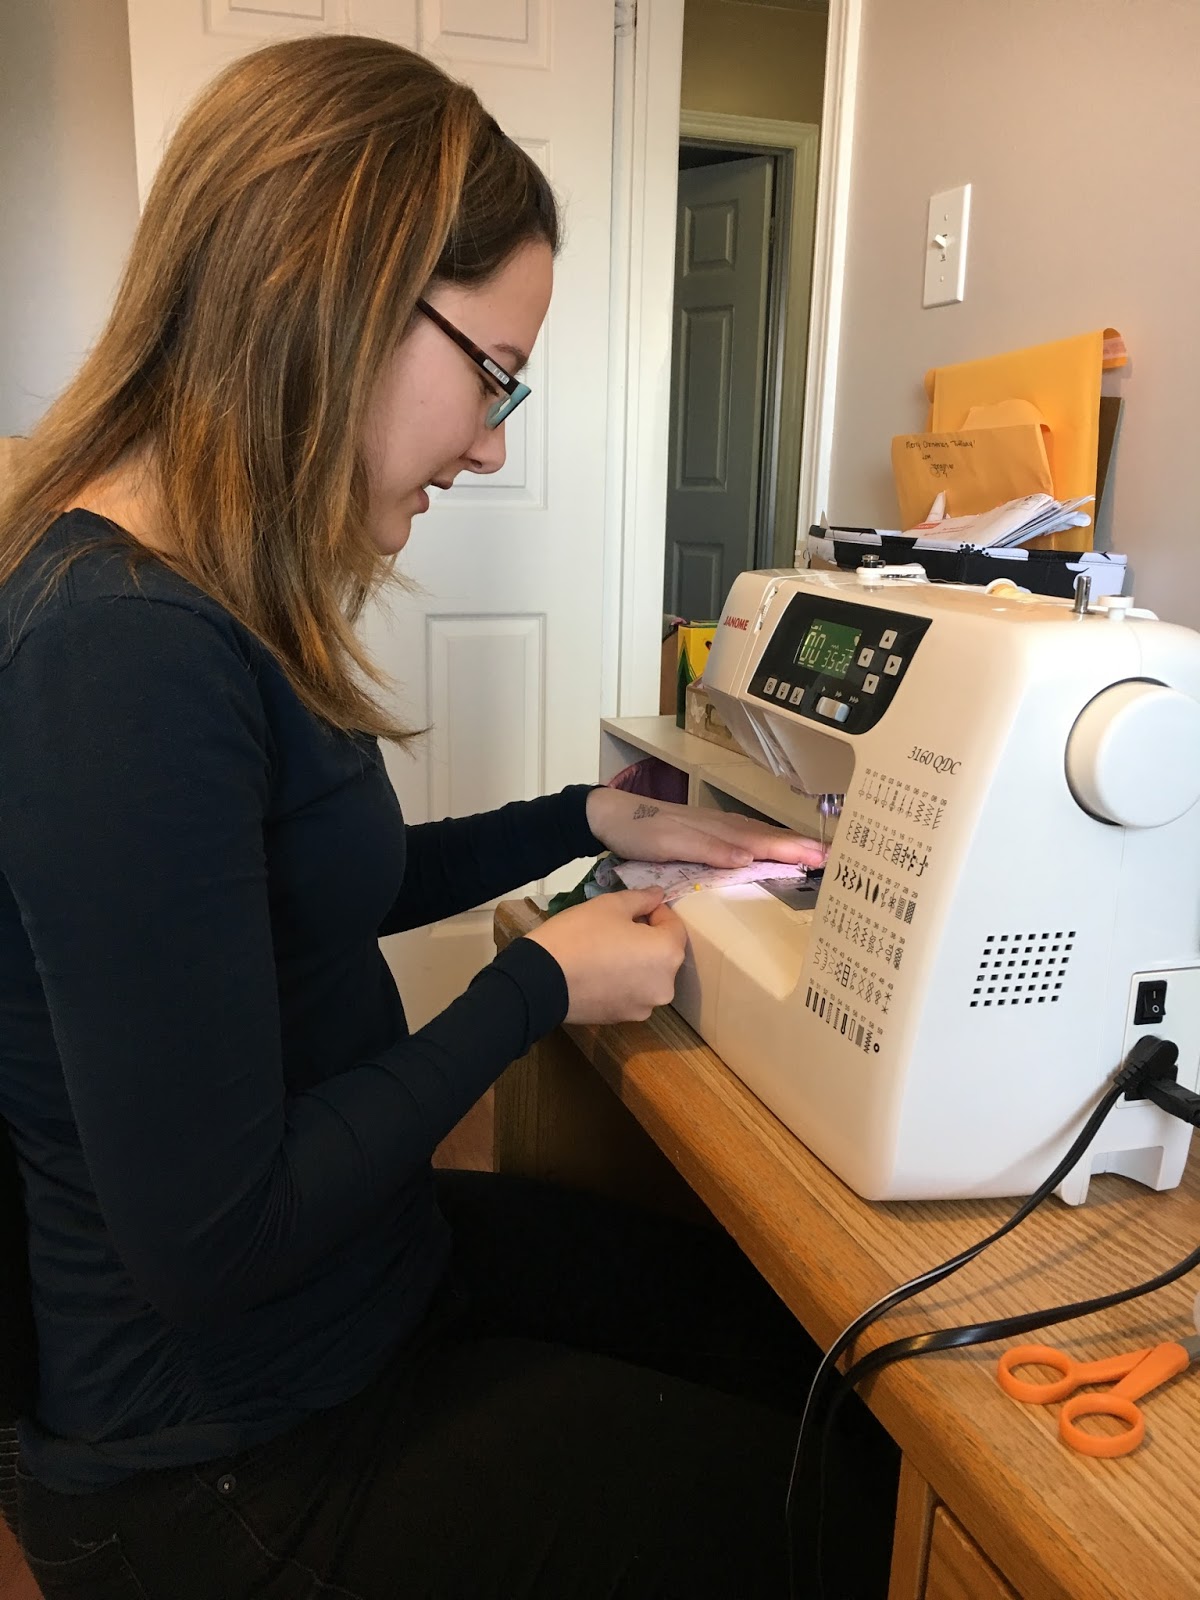
In the same room with all the fabric, Tiffany also has a desk with a fancy sewing machine and a high table that is used to cut fabric on. She has lots of tools and supplies in drawers as well. But, since I had never used a sewing machine before, she started me on the machine with a simple piece of paper.

Tiff explained how the machine works. As you can see in the image, it is digital and has many settings. What she said is important to remember and makes things so much easier, is that you don't have to worry about the amount of pressure you use on the pedal of the machine. When you are ready to sew, you can choose the speed you want the machine to go at. Then, you just rest your foot on the pedal and go ahead and use as little or as much pressure as you are comfortable with. The speed is consistent even if you lift use less pressure the longer you are sewing. It is normal, especially if you are sewing for a long time, for your foot to get tired. Just as you are driving a car, something like cruise control is nice to have. This machine does not have cruise control, but it does keep your speed consistent no matter what. I thought this was a super neat feature on this fancy machine.
Beyond the speed of the machine, there is a couple things that I had to learn before I could 'sew' with my piece of paper like the foot. This is what rests on your fabric and moves with the needle and thread as you push the pedal. It is a little bit tricky to explain in words, but it was easy to understand how it works in person!

Tiffany did not show me how to thread the needle and the machine yet, but she had me use a piece of lined paper to practise with the foot and the speed of the machine. As I was pressing the pedal, I had my piece of paper under the foot and then I pulled a small lever to ensure the foot was in place against the paper, and then I went for it. Tiffany wanted me to practise doing lines. This was tricky at first, as I learned that if you move your paper ever so slightly, the line is no longer straight. I also learned that you can move the entire direction of your paper while the machine is doing its thing. You do not need to stop, move the foot, and go again. You can just use your hands to move the paper as you are going.
Once I got the hang of holding my paper and feeding it through under the foot, I had completed a whole bunch of straight lines along the lines in the paper. This was very exciting and satisfying. I also got to try the different speeds (there are three) and it was crazy how fast the last setting was. You really have to be steady with your hands and be able to feed it through straight, or else it really gets away from you!
Once I choose my fabrics next week and choose a pattern, that is when Tiffany will show me how to thread the machine. She did not want to thread the machine when we would not be using it to sew anything in particular that day. However, I feel like I learned a lot about how the machine works and I thought practising with the piece of lined paper was such a neat idea. I was able to get a feel of how the machine works and what it is like to feed something (in this case, a piece of paper. but in the future, a piece of fabric) through while it is doing the sewing.
I am so excited to choose my pattern and fabrics at our next lesson!
Second Lesson - with Tiffany
November 26th 2016
- Choosing fabrics
For my second lesson with Tiffany, we decided to go straight to picking out fabric. Tiffany suggested that once I decide on my fabrics, it will be easier then to decide on a pattern to do. She said depending on which fabrics I choose, it will change the pattern. So, we spent an afternoon making combinations and trying to decide which fabrics would be best.
Tiffany said that the best material of fabric to use for beginners is a simple cotton. She has lots of flannel in her collection, but she said it would be best to start with choosing out of the cottons. I was also told that we could possibly do a flannel for the backing of the quilt, but that won't be for awhile!
We spent over two hours playing with different combinations of fabrics. I did not have any idea in my mind about whether to do a quilt for a baby boy or a baby girl. So I started playing with different combinations for both genders. Tiffany kept saying that she does not have that many fabrics, but my goodness! I could hardly make any decisions with just the ones she had alone. I cannot imagine would it would've been like to go to an actual fabric store with thousands of options. I was thankful for the smaller amount of options so that I could sit with them, play with them, touch them and move them around with no second thought. Something that you cannot really do at an actual store. As well, it was wonderful because Tiffany really knows the fabrics that she has. So when I would pick a fabric out, she would go and look for one she thought might look nice with it.
Here were some of the combinations and options that we were thinking of...

This one I really liked for a boy. I especially loved the fabric on top - I thought it was so unique! But I ultimately decided that it was too dark for a baby quilt.

I also really liked this combination for a boy. I played with this one a lot, taking the grey in and out. Adding other ones that are not pictured. But I was not totally sold!

Then I was looking at options for girls. There were so, so many. We only took pictures of this one!! But even this one I decided was too dark for a girl. However, I knew after seeing that gorgeous floral fabric that I wanted to do a baby girl quilt.


& These are the fabrics I ultimately ended up choosing!
It was such a wonderful thing that happened with these. When I finally decided on doing a quilt for a girl, we started to come up with so many combinations. I had so, so many. But nothing sold me. I ended up making a bunch of pretty combinations, but they were more suited for a pretty apron or a set of placemats, then a baby quilt.
I was looking at the bottom shelf of large flower print fabrics when I happened to glance up and see the dainty, girly, pretty pink flower print that is pictured here. I saw it and fell in love. I knew I was going to use it. From there it became easy. We knew we had to find colours to match, so we thought of green. Green was tough because Tiff has so many different ones that we had looked at a million times already. Then, all of a sudden, she found this gorgeous green print that we had never looked at before! It matched so beautifully and we both got soooo excited.
So, since we had two patterned fabrics, Tiff suggested we choose one more fabric that is a neutral, soft pattern or a solid colour. That's when we decided on an off-white creamy colour that has very subtle white flowers on it.
DONE!
So exciting!!! I am so so thrilled with these fabrics. I love the patterns. They are girly and even have a bit of a vintage feel to them, which is a dream. I love this look and I am so excited to start working with them next week; cutting & deciding on an official pattern for the quilt.
Third Lesson - with Tiffany
November 26th 2016
- Cutting fabric & choosing a pattern for the quilt
Cutting fabric is a tricky business. However, Tiffany is the most wonderful teacher and made it so easy! I got the hang of it right away.
All of the fabrics come on a bolt. The fabric edges are raw - sometimes with a company's name at the bottom or simply just a rough edge with lots of threads. Sometimes the fabric also has an edge that shows all the colours within that particular design, as seen in this photo.


You have to cut this off, which is usually about one inch. But in order to do all of this, we had to move to the high table in Tiffany's sewing room. On this table she has a self-healing cutting matt that has lines on it so that you can measure your fabric while you cut. It also protects your table from the rotary cutter that we use to cut the fabric with. Once we had cut off all the excess fabric, we were then able to cut our squares.
Since we have three different fabrics, and we want our final product to be 36 x 52 (the size of the 'crib' quilt from the chart in our first lesson) we are going with the pattern 1, 2, 3, 1, 2, 3. With six squares across and nine squares down, at 6" each, we will get a final product of approximately 36 x 52. In order to do this pattern, we would need 18 squares of each fabric, with a total of 54 squares. The fabric is already folded in two on the bolt, so to get our 18 squares, we cut three 6" strips that turned into 3 squares each, totalling 18.

Tiffany has the perfect ruler that is exactly 6" wide. So it made it simple to measure and cut the fabric. She showed me how to do it first, always making sure to push the rotary cutter away from you, and never running it backwards, but picking it up and starting again if it did not cut all the way through.

In this picture, she is cutting off the one inch excess before we cut our 6" strips.
After Tiffany showed me how to cut the fabric, I then got to do all the cutting myself. Her perfectly sized ruler made me feel like a pro & it was actually a lot of fun!


After all the cutting, we laid out the squares in a rough outline of where they will go when we begin to piece it all together for real. I can't wait!

Fourth Lesson - with Tiffany
January 7th 2017
- Threading the sewing machine
- Pinning the squares
- Sewing all nine rows of squares
It has been a long time since I have been able to work on my quilt. There was so much going on with both Tiffany and I, that we found it difficult to get together. We decided it would be best to wait until after the holidays so that there was less busyness and no scheduling conflicts.
However, that being said, this past weekend we finally were able to get together and work a bit on the quilt! She started out by showing me how to thread the sewing machine. It was kind of complicated but I will attempt to explain. We chose a spool of coloured thread that would work with our fabrics and put it on a poll in the top of the machine. Then we followed the written symbols and directions on the machine that show you where to lead your thread. First, we had to wind up this tiny spool with the same thread, and that is what goes in the bottom of the machine under the foot. After we did that, we took the tiny spool and put it in the bottom and pulled the thread out to meet with the foot. Then we pulled the thread from the top of the machine, down through the machine by following the directions. Once this was finished, there were two threads at the foot that always had to be pulled together to the side which you sew.

After she showed me that (which sounds so complicated, and honestly every machine is different. so just follow the instructions on your machine!), she then brought me over to the table that has the self-healing green mat on it. We laid out all the squares for the quilt in the order that they will be in when it is finished. Then, row by row, we began to pin the squares together. Tiff showed me at first how to do it, and then I got the hang of it. What you have to do is take your first square and the second square and have the front side of the fabrics facing each other lined up. You have to make sure that all the edges are completely lined up or else when you pin it and sew it, the whole thing will be crooked and look funny. So after you place the two squares facing each other and have them perfectly lined up, you pin them in place with two pins. Then you open it up and repeat the process with the next square until you have an entire row all pined together.


Once you have this done, you can begin sewing yours squares together! I had practised on the sewing machine in one of my first lessons with Tiffany, where she showed me how it works using lined paper, but this time was a lot different. I felt a lot of pressure and I was super nervous that I would mess up. However, Tiff reminded me that even if I messed up my lines or if the squares were not totally lined up, we could always take out the stitches and do it again, no worries at all. I was thankful to hear this and once I finally pushed my foot on the pedal to go, I was hooked. I flew through the squares and was so excited to be done my first row!

Sewing the squares together is fairly simple when you have everything lined up and prepared ahead of time. Since we had pinned the squares together, when I put it on the machine and put the foot down, everything was perfectly in place and the only thing I had to do, was push the pedal and take out the pins when it got to that part of the fabric. The machine automatically feeds your fabric through, but it was important to help guide it so that the lines were straight. It was really simple to get the hang of.


For my quilt, we have 6 squares in each row and 9 rows total. All of the squares are sewn together in their rows now, and next time we will be sewing all the rows together. It was important to also label each row as we went, since there is a particular pattern that we are following.


I was very excited to get these steps down because I can finally start to see the quilt coming together. I can't wait until next time when we will sew all the rows together and have whole front of the quilt done!!!


Fifth Lesson - With Tiffany
January 28th 2017
- sewing all the rows together to make the front of the quilt
This step was quite tedious but also so much fun, because once I finished this step, it finally looked like a real quilt!!!!
Tiffany helped me a lot with this one because I kept lining the seams up wrong, however, once she showed me for the 5th time (or what seemed like the 5th time), I finally got the hang of it.
All of our rows were labeled from 1-9 which was key to doing this step properly. What you have to do, is take your first row and iron it so that the fabric is completely smooth. Since we had already sewn the squares together, there were seams on the under side of the row, and it was important to lay it out upside down and push the seams flat with the iron. To make this easier, you would gently hold onto the edge of the fabric and pull, while you ironed the seams pushed towards the right. Once this step was done, we laid the row on the table with the top facing down. Then, we took row number two and did the same thing, only this time pushing the seams the opposite direction. This is so that when the two rows are sewn together, they fit together snuggly instead of bulging out. Once the second row was ironed, we took it and placed it facing upwards underneath the other row on the table. Then, all we had to do was pin them together and sew down the edge. While I went along the edge, I took out the pins before the needle got to them.
Then this entire process was just repeated over and over and over, and then between each row being sewn on, we'd make sure to trim any loose threads.


Next time we are going to be choosing a fabric for the back of the quilt - I really want something warm and fuzzy! & Then sewing all the layers together.
Sixth Lesson - With Tiffany
February 11th 2017
- choosing background fabric
- pinning and choosing the quilting design
For this lesson, we were at Tiffany's house like usual, so we decided to choose a fabric from her huge collection. If you remember from the second or third lesson, it took so long for me to decide on the fabrics for my quilt. This time was different though, I knew I wanted a flannel fabric, one that was soft so that it would be snuggly for the baby / in a baby's crib one day. Since I knew I wanted flannel, it narrowed down the options and I was quickly able to decide.

This whole top row is all her flannel options! SO many options. But, these ones quickly stood out to me because they look very similar to the fabrics I had already chosen.

The one in the centre is what I ended up choosing. I wanted the back of the quilt to be more neutral, since it would be coming up over the edges of the front of the quilt for the binding. But, to be sure, we took out each fabric and laid it out with the top of my quilt and examined how it looked. The neutral soft green pattern looked best, so that's what I went with!
So, after we had chosen our fabric, it was time to put all the layers together. If you have ever wondered what makes a quilt feel thick, it is not just the top and the backing that makes it soft and squishy. Inside of those two layers, you put another layer called batting. This is essentially the 'insulation' that makes the quilt thick and warm. It looks like thick white fuzz. The type that we used was 80/20 - 80% cotton and 20% polyester!

This part of the process was probably the most work. Tiffany and I did it all together.
First we took the bolt of fabric off the shelf and brought it to our work table (which was in Tiff's living room, so we had more work space). We unrolled it and measured enough so that it was sticking out from under the top of the quilt about 6 inches. Then we moved away the top of the quilt and got the ironing board out. Since we were using such a huge piece of the fabric, we had to iron out all the kinks and lines in it that occur naturally from it being on the blot. Since the lines were so prominent, it was impossible to get out all the wrinkles, but we got most of them with the help of some little squirts of water!
After this, we laid out all the layers. First we laid the top of the quilt, then the batting, which was about 2 inches beyond the top layer, and lastly the flannel backing which was a total of about 6 inches from the top layer. Next, you have to pin all these layers together. But instead of using the stick pins along the edge, what you do is you take safety pins and stick it through all three layers through the centre of each individual square. This is to ensure that it is completely secure and lined up for the rest of the process. Once everything was pinned, we then took scissors and cut off the batting right along the edge of the top layer, so that all you could see is the flannel sticking out from the bottom.


Once the batting was cut, we then took the clear ruler (the fancy 6 inch, perfect size one) and measured two inches from the edge of the top layer, and used the rotary cutter to take off all the excess flannel fabric. After this, we had the two inches of the fabric sticking out, which was to become our binding later on.

Now was the time to choose what kind of 'quilting' design I wanted to have on my quilt. Quilting actually means the design of the lines you sew through all the layers on the top of the quilt. This part is what has the potential to take so much time, and can become super tedious. I decided to keep it simple, so we went with doing diagonal lines one direction through all the cream coloured squares. These squares don't have that much of an obvious pattern, and the thread that we have been using for the rest of the quilt would look really nice on those squares vs. on the green or pink ones!
Sewing on a diagonal angle sounds like it could get complicated and messy. Trying to keep straight lines is hard enough, let alone while the fabric is sideways and you're going through the centre of the squares, not along the edges. Which makes this tool so awesome - Tiffany has this pen that is bright red and disappears with heat/friction on fabric surfaces. So we took our ruler and drew on the lines that I would follow while sewing on a diagonal angle. As you sew through the squares, it was important to take out the pins as you went along, too.


Once this was all done, I was so excited. I can hardly wait until we get together next time to finish this baby off!
Seventh Lesson - With Tiffany
February 25th 2017
- binding
- adding up costs
Ahhhhhh, finally! Today's the day we finally finished off this beautiful baby quilt. I am so thrilled.
Today we were doing the binding. Some people when they make a quilt, choose to have a border that is different then the fabrics on the top and on the back of the quilt. However, so that it was simple and also I just really liked the idea of it matching, we decided that we would just have the binding as the 'border' of the quilt.
So, as mentioned before, we cut the backing so that there was only 2 inches of it out from the rest of the quilt. The next step was to go side by side, and roll this edge in 1 inch (so in half), and then roll it in one more inch up over the edge of the quilt top. This binding is super thick, so it was important to pin all the way down the edge to hold everything in place. This step is then repeated for each side of the quilt. In the corners where two sides would meet, it would be thicker than the rest, since both edges were rolled together.

Since the binding was so thick with so many layers and tough to hold everything in place as you would sew (plus the flannel fabric itself is thicker and trickier to sew in general!), I decided to keep the pins in as I sewed along the edges. Because of this, there is some very slight puckering in areas on that are visible on the quilt, but I absolutely love it regardless. It gives it character & makes it perfectly imperfect! Once all the sewing was done, I went along and took out all the pins. At the edges of the binding, Tiffany also had me do a special stitch with the machine, that would go backwards and forwards, then knot the string in place, in order to give it extra security, and to ensure it would never unravel.
But then we were DONEEEEE!! I could not believe it, but also I was so so in love with it. As I said, there are some imperfections, but it gives it so much character. I am so thrilled with how it turned out and how beautiful it is. For the finishing touches, we ironed it out (got all the red lines off) and then took some pictures.


Lastly, we added up all the costs! I was surprised that it only cost me $30 to make this beautiful baby crib quilt from scratch. I definitely will be doing this again!


Today we were doing the binding. Some people when they make a quilt, choose to have a border that is different then the fabrics on the top and on the back of the quilt. However, so that it was simple and also I just really liked the idea of it matching, we decided that we would just have the binding as the 'border' of the quilt.
So, as mentioned before, we cut the backing so that there was only 2 inches of it out from the rest of the quilt. The next step was to go side by side, and roll this edge in 1 inch (so in half), and then roll it in one more inch up over the edge of the quilt top. This binding is super thick, so it was important to pin all the way down the edge to hold everything in place. This step is then repeated for each side of the quilt. In the corners where two sides would meet, it would be thicker than the rest, since both edges were rolled together.

Since the binding was so thick with so many layers and tough to hold everything in place as you would sew (plus the flannel fabric itself is thicker and trickier to sew in general!), I decided to keep the pins in as I sewed along the edges. Because of this, there is some very slight puckering in areas on that are visible on the quilt, but I absolutely love it regardless. It gives it character & makes it perfectly imperfect! Once all the sewing was done, I went along and took out all the pins. At the edges of the binding, Tiffany also had me do a special stitch with the machine, that would go backwards and forwards, then knot the string in place, in order to give it extra security, and to ensure it would never unravel.
But then we were DONEEEEE!! I could not believe it, but also I was so so in love with it. As I said, there are some imperfections, but it gives it so much character. I am so thrilled with how it turned out and how beautiful it is. For the finishing touches, we ironed it out (got all the red lines off) and then took some pictures.


And this - this is my beautiful teacher Tiffany. She is so patient and so kind. I love her and am so thankful that she took the time to work with me on this project. If you want, you can find her on YouTube & check out her blog here!

and some final pictures....


I can't wait to see it!! It looks incredible so far :)
ReplyDeleteYou did such an amazing job!! Great work honey!
ReplyDelete